Step-by-Step Guide to Dual Monitor Install for Enhanced Workflow Efficiency
Understanding the Basics of Dual Monitor Install
What is a Dual Monitor Setup?
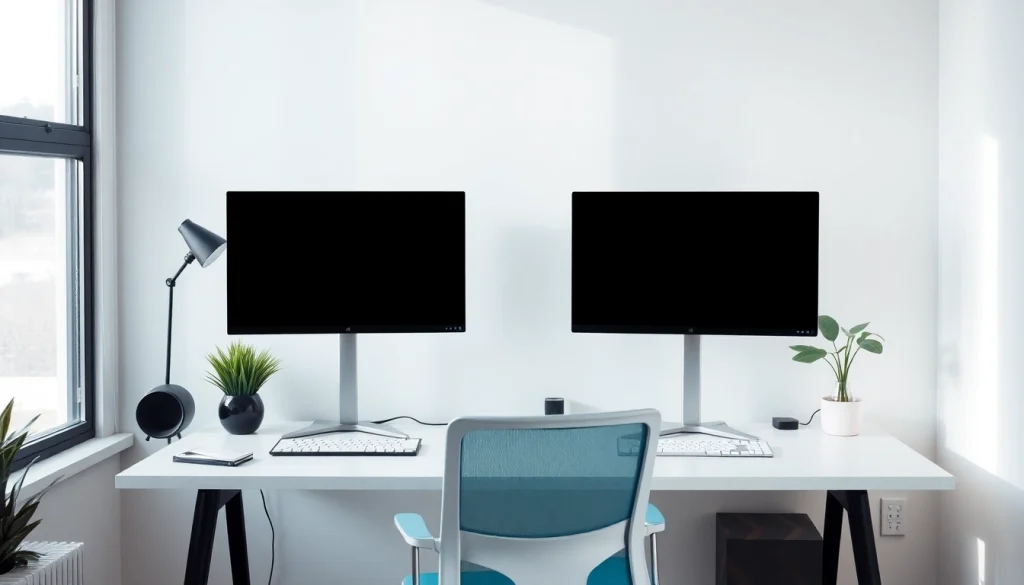
A dual monitor setup refers to the use of two separate display screens connected to a single computer. This configuration has gained popularity among professionals and gamers alike due to its ability to expand the visual workspace significantly. By utilizing two monitors, users can divide tasks effectively, enhance productivity, and create a more immersive experience. Whether for coding, designing, gaming, or multitasking in general, a dual monitor setup offers versatility and convenience. To explore more about dual monitor installation steps, you can refer to dual monitor install.
Benefits of Dual Monitors for Productivity
The advantages of adopting a dual monitor setup are manifold:
- Increased Screen Real Estate: Utilizing two screens allows users to spread out applications or documents, reducing the constant need to toggle between windows.
- Enhanced Multitasking Capabilities: You can work on one screen while referencing information on another, making it easier to juggle multiple tasks.
- Improved Workflow: Design professionals can compare designs side by side or reference online tutorials while applying techniques in software like Photoshop or Illustrator.
- Better Focus: Less time spent minimizing and maximizing applications means more time dedicated to concentration and productivity.
Common Compatibility Issues
Setting up dual monitors can come with its own set of compatibility issues. Here are a few considerations:
- Graphics Card Limitations: Not all graphics cards support multiple displays. It’s essential to check specifications before proceeding.
- Monitor Resolution Variance: Different monitor display resolutions can lead to challenges in visual alignment and usability.
- Connection Ports: Ensure that your computer has the appropriate ports (HDMI, DisplayPort, VGA) available to accommodate your monitors.
Essential Equipment for Dual Monitor Install
Types of Monitors to Consider
Choosing the right monitors is crucial for a successful dual monitor setup. Here are key types to consider:
- IPS Monitors: These offer great color accuracy and wide viewing angles, making them ideal for graphic design or media creation.
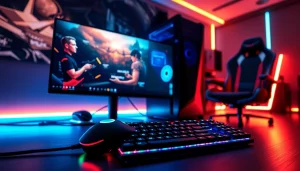
- VA Monitors: Best for deeper blacks and contrast ratios, these monitors are favorable for gaming setups.
- Curved Monitors: These provide an immersive experience by wrapping the screen around your field of view, which can be beneficial in gaming and cinematic tasks.
Necessary Cables and Adapters
Connecting dual monitors requires the right cables and possibly adapters:
- HDMI Cables: Commonly used, HDMI cables handle video and audio signals simultaneously.
- DisplayPort Cables: For high refresh rates and resolutions, especially useful in gaming setups.
- VGA or DVI Cables: Older technology, but can still be useful depending on the monitor and computer compatibility.
- Adapter Cables: Sometimes an adapter is necessary if the monitor and computer outputs do not match (e.g., HDMI to VGA).
Recommended Accessories for an Optimal Setup
In addition to monitors and cables, certain accessories can enhance the dual monitor experience:
- Monitor Stands: These can help in adjusting the height and angle of your displays for a more ergonomic setup.
- USB Hubs: Useful for extending the number of USB ports available, particularly in a workstation with multiple devices connected.
- Cable Management Tools: These tools can help in organizing the cords and ensuring a neat workspace.
- Screen Splitter Software: Many programs can help you organize your workspace across monitors, enhancing the multitasking experience.
Step-by-Step Process for Dual Monitor Install
Checking Computer Compatibility
The first step to a successful dual monitor setup is confirming that your computer can support multiple displays. Here’s how:
- Inspect Graphics Card: Check if your graphics card has multiple output ports. If not, you may need an upgrade.
- Examine System Settings: On Windows, you can check under the Display settings. On macOS, check the Displays section in System Preferences.
- Review Device Specifications: Search for your computer’s model specifications online to understand its capabilities.
Connecting the Monitors
Once you’ve confirmed compatibility, it’s time to connect the monitors:
- Power off your Computer: Always ensure everything is powered down before making hardware changes.
- Connect Cables: Use the appropriate cables to connect each monitor to the respective ports on your graphics card.
- Power On: Once connections are secure, power on the monitors and then your computer.
Configuring Display Settings
After connecting, you will need to configure your display settings to effectively utilize the monitors:
- Open Display Settings: On Windows, go to Start > Settings > System > Display. For macOS, go to System Preferences > Displays.
- Select Arrangement: Choose how the displays should be arranged (e.g., extended vs. mirrored).
- Adjust Resolution: Ensure each monitor is set to its recommended resolution for optimal visual performance.
- Set Primary Monitor: Decide which screen will be your main display where the taskbar or dock appears.
Troubleshooting Dual Monitor Install Issues
Common Problems and Solutions
Even after a successful setup, you may encounter some issues. Here are common problems and their solutions:
- No Signal: Check the cable connections and ensure the correct source is selected on the monitor.
- Screen Flickering: This may indicate a refresh rate issue. Adjust the refresh rate settings in display settings.
- Incorrect Color Display: Color calibration in the monitor settings may solve discrepancies in visual output.
- One Monitor Not Recognized: Restart your computer and check display connections. Ensure each monitor has power.
How to Adjust Display Settings on Different Operating Systems
Adjusting display settings varies slightly by operating system:
- Windows: As mentioned earlier, navigate to Settings > System > Display. Use the ‘Detect’ button if a monitor isn’t recognized.
- macOS: Navigate to System Preferences > Displays, where you can arrange, scale, and set resolutions for each monitor.
- Linux: Gnome or KDE users can access settings through their respective control panels, while others may require command-line interface adjustments.
When to Seek Professional Help
If issues persist, or you encounter problems that feel beyond your skill level, seeking professional assistance may be wise. Signs that you should hire an expert include:
- Inability to identify the source of problems despite troubleshooting efforts.
- Performance issues that affect the usability of your system.
- If upgrades or complex setup configurations are needed that you’re uncomfortable handling.
Advanced Tips for Optimizing Your Dual Monitor Setup
Customizing Display Preferences
To enhance your dual monitor experience, consider these customization options:
- Taskbar Settings: Windows users can choose to have the taskbar display on both monitors or just one.
- Window Management Tools: Consider software like DisplayFusion or AquaSnap for improved window management across screens.
- Desktop Backgrounds: Using a single image spanning both screens can create a more unified workspace.
Using Third-Party Software for Enhanced Features
Several third-party applications can greatly improve your dual monitor experience, including:
- DisplayFusion: This software offers advanced window management, taskbar customization, and other productivity tools.
- MultiMonitorTool: A simple application to help manage multiple monitors, which is particularly useful for switching display settings quickly.
- GridMove: Allows you to move and arrange windows using customizable grid layouts across your screens.
Creating an Ergonomic Workspace with Dual Monitors
Lastly, make sure your dual monitor setup is ergonomic:
- Monitors at Eye Level: Ensure the top of the monitor screen is at or slightly below eye level to reduce neck strain.
- Utilize Monitor Stands: Employ stands to lift screens to eye level or tilt/angle them for optimal viewing.
- Maintain Distance: Keep monitors at least an arm’s length away to minimize eye strain.