How to Install a Peel and Stick Wood Wall in Just Hours

If you’re looking to transform your space quickly and effortlessly, installing a peel and stick wood wall is one of the best DIY projects you can undertake. At Slat Solution, we understand the appeal of adding warmth and texture to any room without the hassle of traditional wood paneling. This article will guide you through the process of installing a peel and stick wood wall, ensuring a smooth, professional finish in just hours.
Why Choose a Peel and Stick Wood Wall?
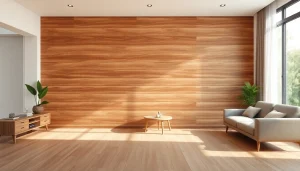
Peel and stick wood walls have become increasingly popular due to their ease of installation, affordability, and the stunning aesthetic they provide. Unlike traditional wood paneling that requires nails, glue, or professional installation, peel and stick wood walls come with adhesive backing, making the application fast and mess-free.
Benefits of Peel and Stick Wood Walls
- Quick Installation: No need for special tools or extensive prep work.
- Cost-Effective: More affordable than real wood planks or traditional paneling.
- Versatile: Suitable for various surfaces including drywall, plaster, and even metal.
- Removable: Many peel and stick options can be removed without damaging walls.
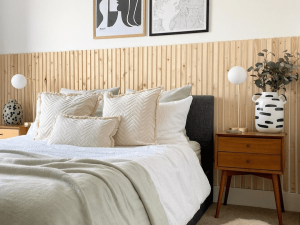
- Aesthetic Appeal: Adds natural texture and warmth to any room, from living rooms to offices.
Preparing Your Space for Installation
Before you start installing your peel and stick wood wall, proper preparation is crucial for the best results.
Clean the Surface
Ensure the wall surface is clean, dry, and free from dust, grease, or loose paint. Use a damp cloth to wipe down the area and allow it to dry completely. A clean surface ensures maximum adhesion for your peel and stick wood wall.
Measure the Wall
Measure the height and width of your wall to calculate how many wood panels you will need. It’s a good idea to purchase a few extra panels to account for any mistakes or cuts.
Gather Your Tools
While peel and stick wood walls require minimal tools, having the following items handy will make the process easier:
- Measuring tape
- Level
- Pencil
- Utility knife or saw for cutting panels
- Roller or squeegee to press panels firmly
Step-by-Step Guide to Installing a Peel and Stick Wood Wall
Now that your space is ready, let’s dive into the installation process.
Step 1: Plan Your Layout
Start by planning the layout of your peel and stick wood wall. Decide whether you want a horizontal, vertical, or diagonal pattern. Using a level and pencil, mark reference lines on your wall to ensure your panels are straight and aligned throughout the installation.
Step 2: Peel Off the Backing
Take your first peel and stick wood panel and carefully peel off the adhesive backing. Be sure to avoid touching the adhesive surface to maintain its stickiness.
Step 3: Position the Panel
Align the panel with your reference lines and press it firmly against the wall. Start from one corner and work your way across, ensuring there are no gaps or overlaps.
Step 4: Secure the Panel
Use a roller or squeegee to press the panel firmly onto the wall. This step removes any air bubbles and guarantees strong adhesion.
Step 5: Continue Installing Panels
Repeat the peeling and sticking process for each subsequent panel. Stagger the seams where possible to create a natural, wood plank appearance.
Step 6: Cut Panels to Fit
For edges, corners, or around outlets, measure carefully and cut your peel and stick wood panels using a utility knife or saw. Fit these pieces snugly to maintain a seamless look.
Step 7: Final Touches
Once all panels are installed, give the wall a final press with the roller to ensure all sections are securely adhered. Clean off any pencil marks or dust from the surface.
Maintenance and Care for Your Peel and Stick Wood Wall
One of the advantages of a peel and stick wood wall is its low maintenance. To keep your wall looking fresh:
- Dust regularly with a soft cloth or duster.
- Wipe with a damp cloth if needed; avoid harsh chemicals.
- Avoid excessive moisture exposure to preserve adhesive longevity.
Troubleshooting Common Issues
While peel and stick wood walls are easy to install, you might encounter a few challenges:
- Bubbles Under Panels: Use a pin to puncture bubbles and press air out, then smooth with a roller.
- Panels Not Sticking: Ensure the wall surface is clean and dry before installation.
- Cutting Errors: Purchase extra panels to have spare material for corrections.
Where to Buy Peel and Stick Wood Walls
At Slat Solution, we offer a wide range of peel and stick wood wall panels crafted from high-quality materials. Whether you prefer rustic reclaimed wood looks or sleek modern finishes, our products are designed for easy installation and durability.
Conclusion
Installing a peel and stick wood wall is a straightforward and rewarding project that can dramatically enhance your interior in just hours. By following the proper preparation and installation steps outlined above, you can achieve a beautiful, professional-looking wood wall without the need for specialized tools or contractors. Embrace the simplicity and style of peel and stick wood walls and transform your space effortlessly with Slat Solution. Remember, the key to success is patience, precision, and having the right materials at hand. Happy decorating!